Chickpea Chips Recipe: Ultra-Crispy

- Time:20 minutes prep + 15 minutes cook = Total 35 minutes
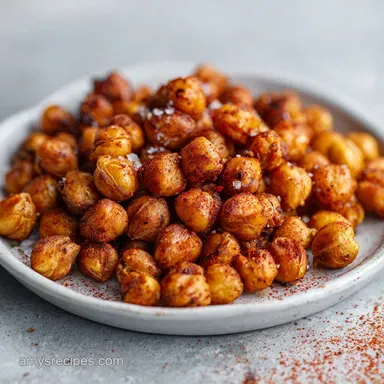
- Flavor/Texture Hook: Smoked paprika warmth with a distinct, brittle snap
- Perfect for: High protein snacking, vegan appetizer platters, or healthy school lunches
Crunchy Protein Packed Chickpea Chips Recipe
That first loud snap when you bite into a homemade chip is everything. For the longest time, I was convinced that "healthy" chips were a total lie. Every time I tried a baked veggie alternative, I ended up with something that tasted like a salted piece of cardboard or, even worse, a soggy cracker that gave up on life the second it hit the plate.
I honestly thought you needed a commercial dehydrator or some secret industrial press to get that actual crunch.
But here is the thing: the problem wasn't the ingredients, it was the thickness. Most people just roast whole chickpeas, which is fine, but it is not a "chip". To get that shatter effect, you have to break the bean down into a smooth paste and roll it thin.
Once I stopped treating them like roasted beans and started treating them like a dough, everything changed.
This recipe is for anyone who wants a savory, salty hit without the heavy feeling of a bag of potato chips. It is straightforward, uses stuff you probably already have in your pantry, and actually delivers on the crunch.
Trust me on this, once you see how easy it is to whip these up, you will never go back to the store-bought versions that are loaded with seed oils.
Quick Recipe Specifications
Before we get into the grit, let's look at the flow. This is a plan based execution, meaning we prep everything first so the cooking part is just a quick slide into the oven. We are talking about a very tight window of active work followed by a short bake.
The process is broken down into three main phases: the blend, the roll, and the crisp. Because we are working with a thin dough, the cook time is incredibly fast. You don't want to walk away from the oven for too long, or you'll go from "golden brown" to "burnt" in about sixty seconds.
To make sure these come out right, keep these three precision checkpoints in mind: the dough must be rolled to exactly 3mm thickness, the oven must be a steady 190°C, and the chips need to rest for 5 minutes after baking to fully harden.
The Secret to the Snap
I used to think these were just about heat, but it is actually about moisture management. When we blend the chickpeas, we are creating a dense matrix of protein and starch. The goal is to get as much water out of the way as possible so the heat can penetrate the chip instantly.
- Water Evaporation
- Rolling the dough to 3mm allows steam to escape rapidly, creating those tiny air pockets that lead to a brittle texture.
- Fat Distribution
- The olive oil coats the chickpea solids, preventing them from sticking together in a gummy mass and helping the heat conduct evenly.
- Starch Setting
- Baking at 190°C quickly sets the structure, locking in the shape before the chips can spread or warp.
- Surface Area
- Slicing into small triangles increases the edge to center ratio, which is where most of the crunch happens.
| Method | Time | Texture | Best For |
|---|---|---|---|
| Oven Bake | 15 min | Evenly brittle | Large batches |
| Air Fryer | 8 min | Extra crispy edges | Single servings |
| Dehydrator | 6 hrs | Very hard/dense | Long term storage |
The Component Analysis
Not every ingredient here is just for flavor. Some are doing the heavy lifting to make sure these don't turn into cookies. The balance of oil to bean is what determines if these will shatter or bend.
| Ingredient | Science Role | Pro Secret |
|---|---|---|
| Canned Chickpeas | Structural Base | Rinse thoroughly to remove the metallic "can" taste |
| Olive Oil | Heat Conductor | Use a high smoke point oil for a cleaner finish |
| Smoked Paprika | Flavor Depth | Adds a "grilled" note that mimics traditional frying |
| Melted Butter | Finishing Crisp | Brushing this on adds a velvety richness and golden color |
Required Gear List

You don't need a professional kitchen for this, but a few specific tools make the process way smoother. If you don't have a food processor, you can use a high powered blender, but you'll need to stop and scrape the sides more often to ensure there are no whole bean chunks left.
A pizza cutter is my favorite way to handle the slicing. Because the dough is rolled out on parchment paper, a rolling knife allows you to zip through the shapes without pulling or tearing the dough. If you use a regular knife, just be careful not to slice through the paper.
Finally,, parchment paper is non negotiable. Chickpea dough is surprisingly sticky. If you try to put this directly on a baking sheet, you'll be scrubbing your pan for an hour. Two sheets of parchment - one for the bottom and one for the top while rolling - is the only way to keep this mess free.
The Cooking Process
Right then, let's crack on. Make sure your oven is already preheated to 190°C before you start the blending process. This ensures the dough doesn't sit around getting too warm and soft.
- Combine the rinsed chickpeas and 30ml olive oil in a food processor. Pulse until the mixture is a smooth, thick paste. Note: Don't over process to the point of heating the dough, just get it smooth.
- Add the 3g garlic powder, 3g onion powder, 1.5g smoked paprika, and 3g salt. Pulse a few more times until the spices are fully incorporated.
- Line a baking sheet with parchment paper. Place the dough onto the center and cover with another piece of parchment paper.
- Roll the dough out until it is roughly 3mm thick. Note: Use a ruler if you're unsure; thickness is the biggest factor in crunch.
- Use a pizza cutter or knife to slice the dough into small triangles or rectangles.
- Slide the parchment paper with the chips onto a preheated baking sheet and bake at 190°C for 12-15 minutes until the edges are golden brown.
- Remove from the oven and brush with 15ml melted butter or vegan butter for a final rich glaze.
- Let the chips cool for 5 minutes on the pan to fully harden.
Stopping Kitchen Disasters
The most common complaint with homemade veggie chips is that they stay soft. Usually, this happens because the dough was too thick or the oven wasn't hot enough. If your chips feel like bendy crackers, you probably didn't roll them thin enough.
Another issue is "bubbling". If the chips puff up too much, it's often because there was too much moisture in the chickpeas. Rinsing and then patting them dry with a paper towel before blending can help a lot.
Why Your Chips Stay Soft
If your chips lack that shatter, it's usually a moisture issue. The water inside the chickpea paste didn't have enough surface area to evaporate during the 15 minute bake.
| Problem | Root Cause | Solution |
|---|---|---|
| Bendy/Soggy | Dough too thick | Roll to 3mm or less |
| Burnt Edges | Oven too hot | Check at 10 mins; lower temp by 10°C |
| Gummy Texture | Under processed | Pulse until completely smooth |
Common Mistakes Checklist
- ✓ Pat chickpeas completely dry after rinsing to reduce steam
- ✓ Use two sheets of parchment to avoid sticking while rolling
- ✓ Ensure the oven is fully preheated to 190°C before sliding chips in
- ✓ Avoid overcrowding the pan to allow air to circulate
- ✓ Let them cool completely on the pan before moving them
Creative Flavor Tweaks
Once you have the base down, you can go wild with the seasonings. The smoked paprika version is a classic, but you can easily swap it for a "Zesty Lime" version by adding lime zest and a pinch of citric acid. For something more intense, a dash of cayenne pepper or chipotle powder works brilliantly.
If you are looking for more high protein snack ideas to keep in your pantry, you might enjoy my No Bake Peanut Butter Energy Bites for a sweet contrast to these savory chips.
Decision Shortcut If you want a cheesy flavor, add 2 tbsp of nutritional yeast to the dough. If you want a spicy kick, replace smoked paprika with crushed red pepper flakes. If you want a "ranch" vibe, add dried dill and a touch of onion powder.
| Original Ingredient | Substitute | Why It Works |
|---|---|---|
| Olive Oil (30ml) | Avocado Oil (30ml) | Similar fat content. Note: More neutral flavor |
| Melted Butter (15ml) | Coconut Oil (15ml) | Works for vegan options. Note: Adds a slight coconut scent |
| Smoked Paprika | Cumin (1.5g) | Adds an earthy, taco like flavor |
Storage and Scraps
To keep these from going stale, you need an airtight container. Once they are completely cooled, toss them in a glass jar or a zip top bag. They will stay crisp for about 4-5 days at room temperature.
If you notice them softening after a few days, you can actually "revive" them by popping them back in the oven at 150°C for 3-5 minutes.
Regarding waste, don't throw away the leftover aquafaba (the liquid in the chickpea can). You can whip it into a vegan meringue or use it as an egg substitute in other baking recipes. If you have leftover dough that didn't make it into a chip, just flatten it into a small pancake and bake it as a "mega chip".
For those who love prepping snacks in advance, these chips fit right into a meal prep routine alongside things like Oreo Protein Balls, giving you both salty and sweet options for the week.
Plating and Dips
Because these have a strong, nutty base, they pair best with dips that have high acidity or creaminess. A classic hummus is the obvious choice, but a spicy sriracha mayo or a cool tzatziki really makes the smoked paprika pop.
When serving them for a crowd, I like to pile them high in a wooden bowl and sprinkle a little extra sea salt on top while they are still warm. If you're feeling fancy, serve them with a side of sliced cucumbers and radishes to add some fresh, watery crunch to the plate.
Fresh vs. Shortcut Comparison
| Feature | Canned Chickpeas (Shortcut) | Dried Chickpeas (Fresh) |
|---|---|---|
| Prep Time | 20 minutes | 12+ hours (soaking) |
| Texture | More consistent/smooth | Slightly grainier |
| Effort | Low | High |
| Taste | Neutral/Mild | Richer, beanier flavor |
Recipe FAQs
Are chickpea chips healthy?
Yes, they are a nutrient dense alternative to corn or potato chips. They provide plant based protein and fiber while utilizing heart healthy olive oil.
Are chickpeas good for diabetes type 2?
Yes, they are generally beneficial. The high fiber content helps slow the absorption of sugar and prevents sharp spikes in blood glucose levels.
Why does my stomach hurt after eating chickpeas?
This is usually caused by oligosaccharides. These are complex sugars found in legumes that can be difficult to digest, often leading to gas and bloating.
How are chickpea chips made?
Pulse rinsed chickpeas and olive oil in a food processor until smooth. Stir in spices, roll the dough to 1/8 inch thickness, and bake at 375°F (190°C) for 12 15 minutes.
How to store these chips?
Place completely cooled chips in an airtight glass jar or zip-top bag. They will remain crisp for 4-5 days at room temperature.
Why are my chips not crispy?
The dough was likely rolled too thick. Ensure the dough is exactly 1/8 inch (3mm) and let them cool on the pan for 5 minutes to fully harden.
Is it true that you must deep fry chickpeas to get a crunchy texture?
No, this is a common misconception. Baking them at 375°F (190°C) for 12-15 minutes creates a satisfying crunch without the need for oil frying.
Crispy Chickpea Chips