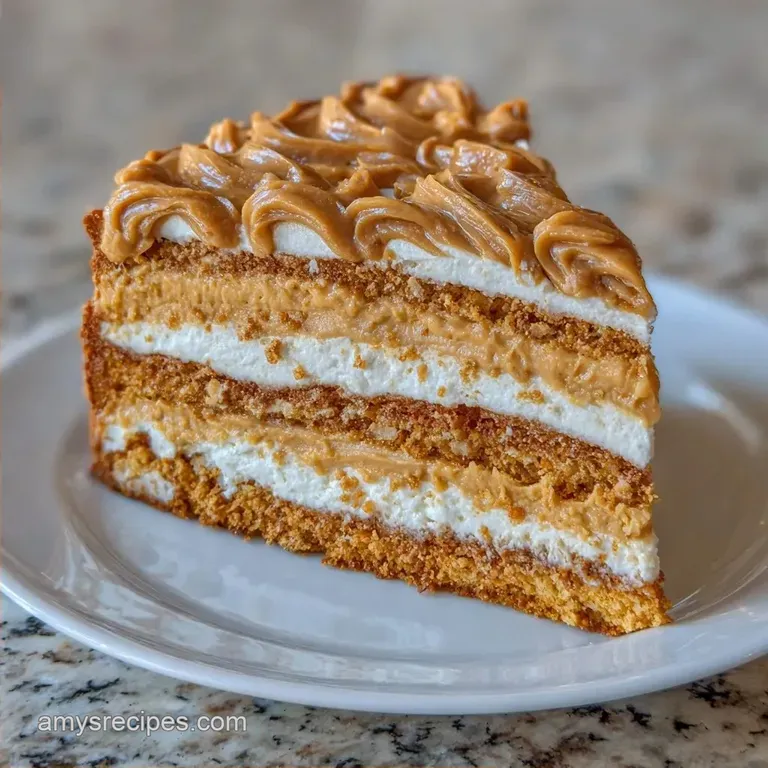
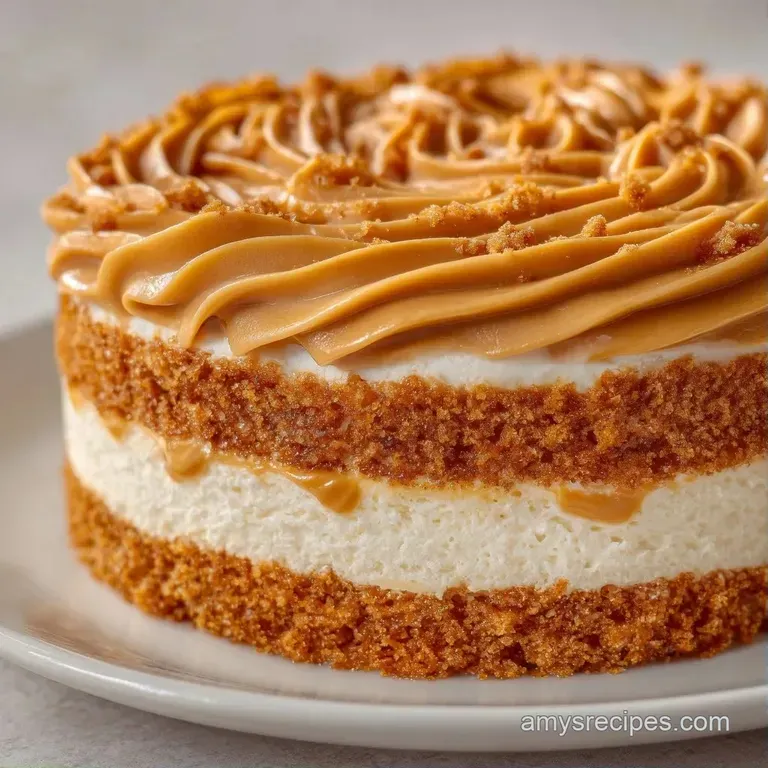
Peanut Butter Frosting Cake: Tender and Moist
- Time:15 minutes active + 30 minutes baking
- Flavor/Texture Hook: Velvety frosting with a moist, buttery sponge
- Perfect for: Birthday celebrations or a high reward weekend treat
The scent of toasted peanuts and browned butter hitting the oven air is basically a hug in scent form. I remember this one time I tried to rush a cake for my cousin's birthday, and I frosted it while it was still lukewarm.
The frosting didn't just melt, it practically migrated off the cake and pooled on the plate like a peanut butter lake. I spent twenty minutes frantically trying to "scoop" it back on, which just made it look like a lumpy mountain.
Since then, I've learned that patience is the actual secret ingredient here. You can't cheat the cooling process if you want those clean, sharp edges on your frosting. This recipe focuses on a quick win, giving you a high end result without needing professional tools or a degree in pastry arts.
We're aiming for a Peanut Butter Frosting Cake that feels decadent but doesn't leave you feeling like you need a nap immediately after one slice. It's all about the balance between the salt in the peanut butter and the sweetness of the sponge. Let's crack on and get this in the oven.
Peanut Butter Frosting Cake Secrets
When you're putting together a Peanut Butter Frosting Cake, the goal is to avoid that "cloying" feeling where the sugar overwhelms everything. I've found that adding a tiny bit of extra salt to the frosting actually makes the peanut butter taste more intense, not less. It's a weird little paradox of baking.
Another thing I've noticed is that the temperature of your butter is non negotiable. If your butter is too melted, your cake will be dense. If it's too cold, you'll have little lumps of fat in the batter. You want it to be "pliable," meaning you can press your finger into it and it leaves an indent but doesn't slide.
Trust me on this: the frosting needs to be whipped longer than you think. Most people stop as soon as the sugar is mixed in, but if you keep going for another minute, you incorporate air that transforms the texture from "heavy paste" to "cloud like".
It's the difference between a grocery store cake and something that feels homemade and special.
The Secret to Better Texture
Instead of the usual "cream butter and sugar" start, we're using a method that feels a bit more like making a pie crust. This changes the way the flour interacts with the fat.
The Sand Effect: By rubbing butter into the dry ingredients first, we coat the flour in fat. This blocks some of the gluten from forming, which keeps the cake tender and prevents it from becoming bread like.
Air Trapping: Beating the butter and peanut butter on high before adding sugar creates tiny air pockets. These pockets expand in the oven, giving the sponge a lift that feels light rather than leaden.
Moisture Balance: Using whole milk instead of water provides a bit of extra fat and protein. This ensures the cake stays moist for days, even if you keep it in the fridge.
Sugar Dissolution: Adding powdered sugar in batches to the frosting prevents the butter from separating. It allows the sugar to dissolve slowly into the fat, creating a silky finish.
| Method | Time | Texture | Best For |
|---|---|---|---|
| Fast Mix | 10 mins | Denser | Quick snacks |
| Classic Rub | 15 mins | Velvety | Occasions |
Ingredient Roles and Logic
Understanding what each part does helps when you're staring at a half empty pantry. For instance, the baking powder is doing the heavy lifting here, reacting with the heat to push the cake upward.
| Ingredient | Science Role | Pro Secret |
|---|---|---|
| All Purpose Flour | Structure | Sift it to avoid clumps in the peanut butter base |
| Baking Powder | Lift | Ensure it's fresh or the cake will be flat |
| Powdered Sugar | Stability | Sifting is mandatory for a smooth, non grainy frosting |
| Peanut Butter | Flavor/Fat | Use a brand with no added oil for a stiffer peak |
Essential Baking Tools
You don't need a fancy kitchen to make this, but a few things make the process way smoother. I usually use a stand mixer such as KitchenAid for the frosting, but a hand mixer works just as well if you're okay with a little more arm work.
For the pans, 8 inch rounds are the standard. I always use parchment paper circles at the bottom. I once forgot them, and the cake stuck so badly I basically had to eat the bottom 10% of the cake straight out of the pan with a spoon. It was still tasty, but not exactly the "presentation" I wanted for a party.
An offset spatula is the real hero here. If you don't have one, a butter knife works, but you'll spend more time fighting the frosting. The flat, angled blade of a spatula allows you to glide across the cake without pulling the sponge apart.
Step by step Baking Guide
Let's get into the actual making. Remember, the most important part is making sure your cake is completely cool before you even think about the frosting.
Phase 1: Prepping the Base
- Preheat oven to 350°F (175°C). Grease and line two 8 inch cake pans with parchment paper. Note: This prevents the cake from sticking to the sides.
- Whisk together the all purpose flour, granulated sugar, baking powder, and salt in a large bowl.
- Beat in the softened butter until the mixture resembles coarse sand. Continue until no large lumps of butter remain.
- Add the eggs and whole milk, beating on medium speed until the batter is smooth and pale.
- Divide the batter evenly between the two pans and bake for 25–30 minutes until a toothpick inserted in the center comes out clean.
- Allow the cakes to cool completely before frosting. Note: This is where most people fail; wait at least 2 hours.
Phase 2: Whipping the Frosting
- Beat the softened butter and peanut butter on high for 2 minutes until pale and fluffy.
- Incorporate the powdered sugar in three separate batches, beating on low until combined, then high for 30 seconds per batch. Note: Doing this prevents a "sugar cloud" from hitting your face.
- Mix in the heavy cream and vanilla extract. Whip on high for 1 final minute until the frosting holds a stiff peak.
Phase 3: Finishing the Cake
- Layer the cooled cakes with the peanut butter frosting, using an offset spatula to smooth the top and sides.
Chef's Note: If you want a more professional look, do a "crumb coat." Apply a very thin layer of frosting to the whole cake, freeze it for 15 minutes to lock in the crumbs, then apply the final thick layer.
Fixing Common Baking Errors
Even the best of us mess up. I've had cakes that came out looking like pancakes and frosting that looked like soup. Most of these problems are easy to fix if you know what caused them.
Troubleshooting Common Issues
| Issue | Solution |
|---|---|
| Why Your Cake Sinks | If the middle of your Peanut Butter Frosting Cake collapses, it's usually because the oven door was opened too early. |
| Why Your Frosting is Runny | Runny frosting usually comes down to the temperature of the butter. If the butter was too soft (almost melted), it can't hold the weight of the powdered sugar. It just turns into a glaze. |
| Why Your Sponge is Tough | Over mixing the batter after adding the milk is the main culprit here. When you mix too much, you develop too much gluten, and your cake starts tasting like a bagel. |
Common Mistakes Checklist
- ✓ Checked that butter is room temp (not melted)
- ✓ Sifted the powdered sugar to avoid lumps
- ✓ Used parchment paper to prevent sticking
- ✓ Waited for the cake to be fully cool
- ✓ Avoided over mixing once milk was added
Creative Flavor Twists
Once you've nailed the basic Peanut Butter Frosting Cake, you can start playing with the flavors. I love experimenting here because peanut butter is such a versatile base.
For a Peanut Butter Frosting Chocolate Cake, simply swap the all purpose flour for a 50/50 mix of flour and high-quality cocoa powder. You'll need to add about 2 extra tablespoons of milk to keep the batter from getting too thick. It's a classic combination that never fails.
If you're looking for something a bit more sophisticated, try adding a teaspoon of espresso powder to the batter. It doesn't make the cake taste like coffee, but it deepens the peanut butter flavor and cuts through the sweetness. This is similar to how bakers use coffee in chocolate cakes to make the chocolate "pop".
For those who want a different style of treat, you might try my moist peanut butter cake for a denser, fudge like experience. Or, if you're making a huge party spread, check out this easy peanut butter cake for 20 servings.
For a Velvety Texture
Try substituting the heavy cream in the frosting with a tablespoon of mascarpone cheese. It adds a slight tang and an incredible richness that makes the frosting feel like it came from a high end patisserie.
For a dairy-free Version
You can use a vegan butter substitute and almond milk. Just be careful with the brand of vegan butter, as some have a higher water content which can make the frosting softer.
| Original Ingredient | Substitute | Why It Works |
|---|---|---|
| Heavy Cream (3 tbsp) | Coconut Cream (3 tbsp) | Similar fat content. Note: Adds a slight coconut hint |
| All Purpose Flour (2 cups) | gluten-free 1:1 Blend (2 cups) | Mimics structure. Note: Crumb may be slightly grittier |
| Whole Milk (1 cup) | Oat Milk (1 cup) | Neutral flavor and creamy. Note: Slightly less richness |
Freshness and Storage Tips
A Peanut Butter Frosting Cake actually tastes better the next day because the flavors have time to meld. However, because of the butter in the frosting, you have to be smart about how you store it.
Keep the cake in an airtight container in the fridge for up to 5 days. The frosting will firm up, which actually makes it easier to slice. Just make sure you take the cake out about 30 to 60 minutes before serving.
Eating a cold butter based cake is like eating a stick of cold butter, and it kills the flavor.
For long term storage, you can freeze the layers without frosting. Wrap them tightly in plastic wrap and then a layer of foil. They'll stay fresh for up to 3 months. When you're ready, let them thaw at room temperature before adding the frosting.
If you have leftover frosting, don't throw it away! It's basically a high end dip. I often put a bowl of it on the table with some apple slices or pretzels. It's a great way to ensure zero waste in the kitchen.
Pro Presentation Ideas
You don't need to be a professional decorator to make this look impressive. The trick is to embrace the "homemade" look while adding a few sharp details.
Start by adding a sprinkle of flaky sea salt on top of the frosting. It looks beautiful and provides a sharp contrast to the sweetness. You can also press crushed roasted peanuts around the bottom edge of the cake to hide any uneven frosting and add a nice crunch.
If you have a piping bag, create a few swirls of frosting on top and place a single peanut or a small piece of chocolate on each peak. It's a simple touch that makes the cake look like it cost 50 dollars.
For a more rustic vibe, leave the sides "naked" by only frosting the top and a thin layer in the middle. This shows off the golden color of the sponge and makes the cake feel a bit less heavy.
Decision Shortcut
- If you want a professional look, do a crumb coat and use a spatula.
- If you're in a rush, do a naked cake with a salt sprinkle.
- If it's for a kid's party, load it up with peanut butter cups on top.
Recipe FAQs
Can you use peanut butter as frosting?
Yes, but it requires stability. Pure peanut butter is too oily to hold its shape, so blending it with butter and powdered sugar creates a pipeable frosting.
What kind of peanut butter is best for icing?
Creamy peanut butter is the best choice. It ensures a smooth, professional finish without chunks. If you enjoyed the texture of creamy peanut butter here, the same flavor base is used in our protein energy balls.
How to apply the peanut butter frosting?
Layer the cooled cakes with frosting using an offset spatula. Start with a center layer and then smooth the frosting over the top and sides for a clean look.
Can you make a 3-ingredient peanut butter frosting?
Yes, by combining peanut butter, butter, and powdered sugar. This creates a stable, sweet frosting without the need for heavy cream or vanilla.
Can you make a 2-ingredient peanut butter frosting?
No, this usually creates a runny glaze. Without butter or enough powdered sugar, the frosting lacks the structural integrity needed to hold stiff peaks.
Is it true you must refrigerate the cake before frosting?
No, this is a common misconception. The cakes simply need to be completely cool to prevent the butter based frosting from melting and sliding off.
How to make the buttercream for diabetics?
Replace the powdered sugar with a sugar-free substitute. This modification reduces the glycemic impact while maintaining the frosting's creamy consistency.
Peanut Butter Frosting Cake

