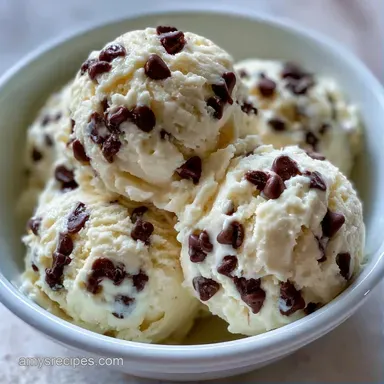
Creamy Automatic Ice Cream Maker Recipe with Pecans

- Time: 10 min active + 25 hrs chilling/freezing
- Flavor/Texture Hook: Rich and creamy with crunchy pecan bits
- Perfect for: Summer parties or a little weekend treat
The sound of an ice cream maker churning is like a lullaby for dessert lovers. It's that steady, mechanical hum that tells you something decadent is happening in the bowl. I remember the first time I tried this, the smell of pure vanilla filled the kitchen, and I couldn't wait for that exact moment when the liquid finally thickens into a soft, swirling cloud.
This isn't about fancy techniques or expensive stabilizers. It's just about getting the temperature right and letting the machine do the heavy lifting. You'll end up with a treat that feels like a love language in a bowl.
Whether you're making this for a crowd or just for yourself, this Creamy Automatic Ice Cream Maker Recipe delivers that nostalgic, old school flavor. It's rich, it's cold, and it doesn't have that weird artificial aftertaste you get from store-bought pints.
Creamy Automatic Ice Cream Maker Recipe
The magic happens when you balance the fat and the sugar. If you've ever had ice cream that felt like eating a popsicle, it's usually because there wasn't enough fat to block the water from freezing into shards. For a different approach, some people prefer a Homemade Ice Cream recipe method, but the automatic way is just so much easier on the arms.
The Trick Behind Texture - Fat Content: Heavy cream provides the structure that keeps the texture smooth and prevents ice crystals. - Sugar's Role: Sugar lowers the freezing point of the mixture, which keeps the ice cream from turning into a solid block of ice.
According to Serious Eats, the air incorporated during churning, known as overrun, is what gives the dessert its light, scoopable feel.
| Method | Time | Texture | Best For |
|---|---|---|---|
| Automatic | 25 mins | Smooth & Airy | Daily treats |
| Hand Churn | 4 hours | Dense & Rich | Traditionalists |
| No Churn | 6 hours | Fudgy/Heavy | No equipment |
The Building Blocks
Every ingredient here has a job. If you skip the salt, for example, the vanilla tastes flat. The salt doesn't make it salty, it just makes the other flavors pop.
What Each Ingredient Does
| Ingredient | What It Does | Best Swap |
|---|---|---|
| Heavy Cream | Adds fat for smoothness | Full fat coconut cream |
| Whole Milk | Balances richness | Evaporated milk |
| Granulated Sugar | Sweetens & softens | Honey (adds floral note) |
Right then, let's look at the full list. Make sure your dairy is chilled before you start.
- 2 cups heavy whipping cream, chilled Why this? High fat prevents iciness
- 1 cup whole milk, chilled Why this? Adds a lighter liquid base
- 3/4 cup granulated white sugar Why this? Essential for the freezing point
- 1 tbsp pure vanilla extract Why this? Classic, aromatic flavor
- 1/4 tsp fine sea salt Why this? Balances the sugar
- 1/2 cup semi sweet chocolate chips Why this? Adds a rich snap
- 1/2 cup crushed toasted pecans Why this? Nutty crunch
- 1/4 cup rainbow sprinkles Why this? For a pop of color
Equipment Needed
You don't need a professional kitchen for this, just a few basics. The most important part is the canister. If your canister isn't frozen solid, the machine will just stir warm cream for an hour and you'll be very disappointed.
I usually use a standard automatic maker, something like a Cuisinart, but any brand works as long as the bowl is pre frozen. You'll also need a large mixing bowl and a whisk. A freezer safe container for the final set is a must.
The Cooking Process
Let's crack on. The goal here is to get the sugar dissolved completely so you don't feel any grit when you eat.
- Whisk the granulated sugar and fine sea salt into the whole milk. Note: Whisk until the grains start to disappear.
- Stir in the chilled heavy whipping cream and vanilla extract. Whisk vigorously for 2 minutes until the mixture is smooth and glossy.
- Place the bowl in the refrigerator for 1 hour. Note: This ensures the base is cold before it hits the canister.
- Pour the chilled mixture into your pre frozen ice cream maker canister.
- Turn the machine on and churn for 20-30 minutes until it reaches a soft serve consistency.
- Fold in the chocolate chips, toasted pecans, and sprinkles during the final 5 minutes of churning.
- Scoop the ice cream into a freezer safe container.
- Press parchment paper or plastic wrap directly onto the surface until it's sealed to stop freezer burn.
- Freeze until fully set, which takes about 24 hours for a hard scoop.
Fixing Common Mistakes

Even the best of us hit a snag. Usually, it's a temperature issue. If the mix is too warm, it won't thicken. If the bowl isn't cold enough, it just spins.
Icy Texture
This happens when the base is too thin or the freezing process is too slow. Using a higher fat cream or adding a bit more sugar helps.
Machine Won't Turn
If the paddle stops, your ice cream has become too thick for the motor. Turn it off and let it sit for 5 minutes before trying again.
Too Soft
This usually means the canister wasn't frozen long enough. You can't "fix" this in the machine, but you can save it by freezing the result for another few hours.
| Problem | Root Cause | Solution |
|---|---|---|
| Icy crystals | Not enough fat | Use heavy cream, not half and half |
| Gritty texture | Sugar didn't dissolve | Whisk longer before chilling |
| Slow churning | Warm canister | Freeze bowl for 24 hours |
Creative Twists and Swaps
If you're feeling adventurous, this base is a great starting point. I love swapping the vanilla for almond extract or adding a swirl of salted caramel at the end. For something more decadent, you can try a chocolate ice cream recipe by adding cocoa powder to the milk.
Flavor Ideas
- Mint Chip: Add a drop of peppermint oil and swap pecans for more chips.
- Strawberry: Blend 1 cup of fresh strawberries and stir them in at the end.
- Coffee: Dissolve 2 tbsp of espresso powder into the milk.
Dietary Adjustments - dairy-free: Use full fat coconut milk and coconut cream. The texture remains rich. - Low Sugar: Use a monk fruit sweetener, but keep in mind the freezing point changes, so it might stay a bit firmer.
If you want a smaller batch, just halve everything. Use a smaller container and reduce the churn time by about 20%. When doubling the recipe, I recommend working in two batches so you don't overflow the canister.
| Plating Style | Tweak | Effect |
|---|---|---|
| Simple | Large chilled bowl | Casual, homey feel |
| Polished | Stemmed glass + mint leaf | Elegant dinner party |
| Restaurant | Quenelle + berry coulis | High end presentation |
Ice Cream Myths
You'll hear a lot of advice online, but some of it is just noise. Let's clear a few things up.
One big myth is that you need to "temper" the cream for this specific automatic method. While that's great for custard based ice creams with eggs, for a simple cream base, chilling it is all you need.
Another one is that the brand of the machine changes the taste. It doesn't. As long as the bowl gets cold and the paddle turns, the flavor comes from your ingredients, not the plastic of the machine.
Storage Guidelines
Keep your ice cream in an airtight container in the back of the freezer, away from the door where the temperature fluctuates. It stays fresh for about 2 weeks. After that, it might start to develop those ice crystals we hate.
To avoid freezer burn, always keep the plastic wrap touching the surface of the ice cream. This blocks air from getting in.
Zero Waste Tips
- Leftover Cream: If you have a bit of heavy cream left, whip it up with a pinch of sugar to top your scoops.
- Pecan Shells: If you roast your own nuts, add the shells to your compost bin.
- Empty Containers: Wash your plastic tubs and use them for freezing leftover herbs in oil.
Perfect Complements
This treat is rich, so it pairs best with something tart or salty. I love serving it with a side of fresh raspberries or a slice of warm, salted fudge brownie.
If you want a drink to go with it, a strong cold brew coffee cuts through the creaminess perfectly. For a real treat, put a scoop of this ice cream into a glass of sparkling cider for a homemade float. It's simple, but it feels like a celebration.
Recipe FAQs
How to make homemade ice cream creamy and not icy?
Keep the base chilled and press plastic wrap on the surface. Refrigerating the mixture for 1 hour before churning and blocking air in the freezer prevents ice crystals from forming.
What is the simplest recipe for creamy ice cream?
Combine whole milk, sugar, salt, chilled heavy cream, and vanilla. This base is fast and effective because it requires no cooking or tempering.
How to make ice cream using an ice cream maker?
Pour the chilled mixture into a pre-frozen canister and churn for 20–30 minutes. Stop once the ice cream reaches a soft-serve consistency.
How to prepare the base for an automatic ice cream maker?
Whisk sugar and salt into whole milk, then stir in chilled heavy cream and vanilla. Refrigerate the mixture for one hour to ensure it is cold before churning.
Can I substitute the chocolate chips and pecans?
Yes, you can use different small mix-ins. If you enjoy the balance of flavors here, see how we handle mix-ins in our Maker Recipe for 6.
Is it true that I must make my own heavy cream for ice cream?
No, this is a common misconception. store-bought chilled heavy whipping cream is ideal for achieving the correct fat ratio for a smooth texture.
How to store ice cream to maintain texture?
Place it in an airtight container in the back of the freezer. Keep plastic wrap touching the surface to block air and prevent freezer burn.
Automatic Ice Cream for 8 Servings