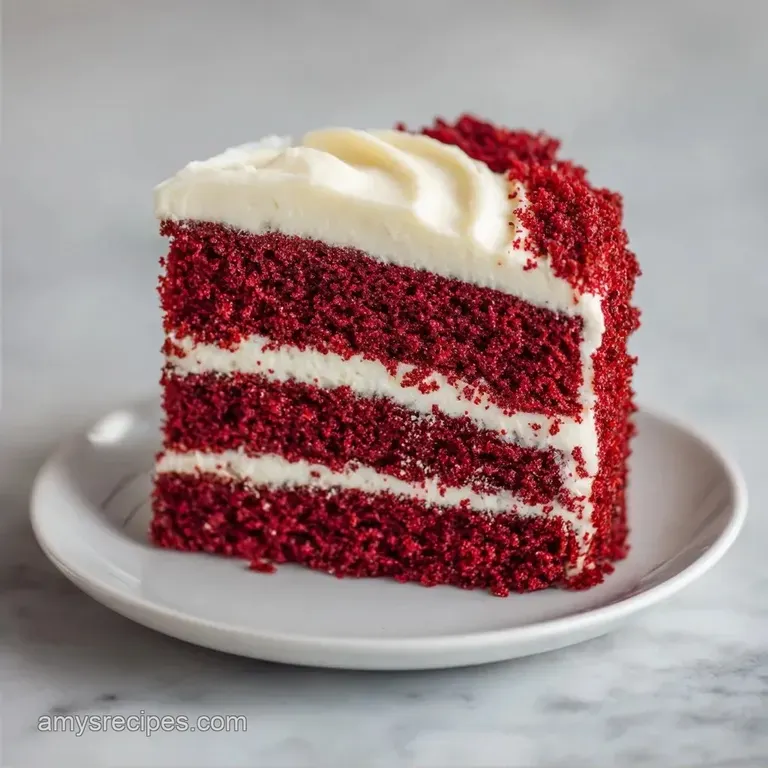
Red Velvet Cream Cheese Cake: Failure-Proof
- Time: 30 min active + 4 hr chilling
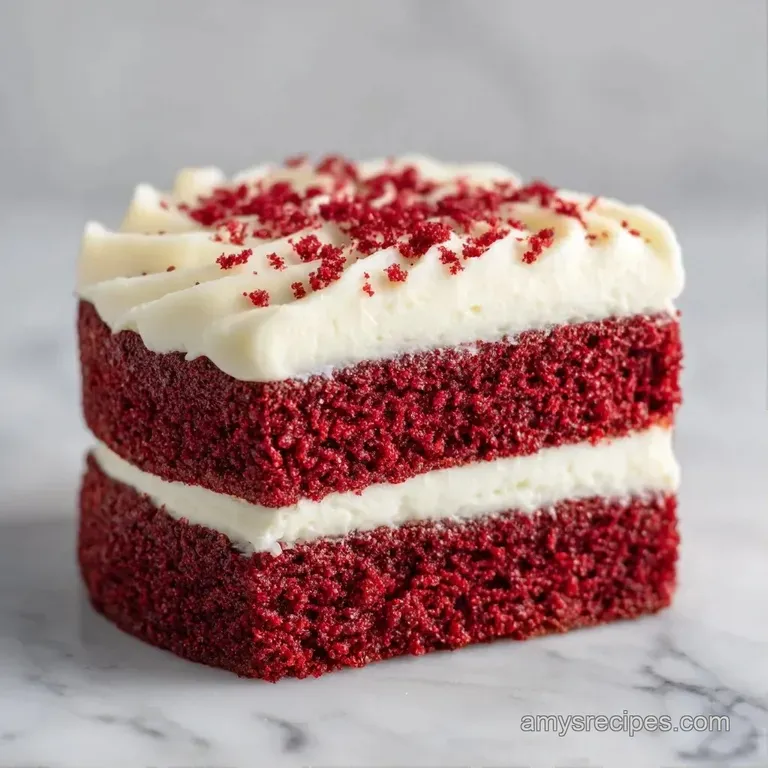
- Flavor/Texture Hook: Velvety, tight crumb cake with a silky, tart finish
- Perfect for: Birthdays, anniversaries, or when you need a total crowd pleaser
The Best Red Velvet Cream Cheese Cake
The smell of cocoa and vinegar hitting a hot oven is something you never forget. It's a weird combination on paper, but once that cake starts to rise, the aroma transforms into something warm and nostalgic.
I remember the first time I tried to make this without the vinegar, thinking it was just a weird old school additive. The result was a flat, chocolate colored disc that tasted like sadness. That was the moment I realized this cake isn't about the color; it's about the chemical dance happening inside the batter.
Most people think this is just a chocolate cake with a fancy dye job. Honestly, that's a myth. A real Red Velvet Cream Cheese Cake has a distinct tang and a texture that's closer to a velvet ribbon than a standard sponge. It's supposed to be subtle. If it tastes like a melted chocolate bar, you've used too much cocoa.
It should be a delicate balance of cocoa, acidity, and sweetness.
We're going for a result that's silky and stable. You want a cake that looks professional but tastes like it came from a Southern kitchen. We'll focus on the crumb that tight, soft texture and a frosting that holds its shape even when the room gets warm. Let's get into the details.
The Truth About Red Velvet
The biggest misconception is that the red color comes from the cocoa. Back in the day, non alkalized cocoa reacted with acid to turn a reddish brown. Modern cocoa is usually processed (Dutched), so it doesn't do that naturally. That's why we add food coloring now. But the soul of the cake is the acidity.
Acid Activation: The vinegar and buttermilk react with the baking soda to create carbon dioxide bubbles. This is what gives the cake its lift and that signature "velvet" feel.
Cocoa Balance: Using a small amount of cocoa keeps the flavor from overpowering the buttermilk. It's a background note, not the lead singer.
Fat Emulsion: Vegetable oil is used instead of butter in the cake layers. This ensures the cake stays moist even after it's been in the fridge for a few days.
Protein Structure: Cake flour has less protein than all purpose flour. This prevents the cake from getting tough or bread like, keeping the crumb tender.
| Method | Bake Time | Texture | Best For |
|---|---|---|---|
| Standard Oven | 25-30 mins | Even rise, golden edges | Traditional layers |
| Slow Cooker | 2-3 hours | Steamed, denser, very moist | Single deep cake |
| Sheet Pan | 15-20 mins | Thin, light, easy to frost | Cake rolls or bars |
Component Analysis
Understanding why we use these specific items helps you avoid the "sink" in the middle. If you're curious about the role of flour, King Arthur Baking explains how protein content affects the final crumb.
| Ingredient | Science Role | Pro Secret |
|---|---|---|
| Cake Flour | Lowers gluten | Sift twice for maximum air |
| Buttermilk | Tenderizes crumb | Room temp prevents batter splitting |
| Vinegar | Activates soda | Use distilled white for clean flavor |
| Cream Cheese | Structural fat | Cold cheese makes the frosting unstable |
Essential Ingredients
For the Crimson Cake Layers: - 2.5 cups cake flour Why this? Low protein for a softer, more tender crumb - 1.5 cups granulated sugar - 1 tsp baking soda - 1 tsp salt - 2 tbsp natural cocoa powder Why this? Subtle flavor; doesn't mask the tang - 1 cup
Buttermilk Why this? Adds acidity and moisture - 2 large eggs - 1.5 cups vegetable oil Why this? Keeps cake moist when chilled - 1 tsp white distilled vinegar - 1 tsp vanilla extract - 2 tbsp red food coloring
For the Tangy Cream Cheese Frosting: - 16 oz full fat cream cheese Why this? Essential for stability and richness - 1 cup unsalted butter - 4 cups powdered sugar - 1 tsp vanilla extract - 0.25 tsp salt
Substitution Options:
| Original Ingredient | Substitute | Why It Works |
|---|---|---|
| Cake Flour | AP Flour + 2tbsp cornstarch | Mimics low protein. Note: Slightly denser |
| Buttermilk | Milk + 1tbsp lemon juice | Creates lactic acid. Note: Less thick |
| Vegetable Oil | Melted Coconut Oil | Similar fat. Note: Adds slight coconut scent |
| Red Food Color | Beet Powder | Natural option. Note: Earthy taste, duller color |
Required Kitchen Tools
You don't need a professional kitchen, but a few things make this way easier. I use a stand mixer such as a KitchenAid for the frosting, but a hand mixer works too.
- Three 8 inch round cake pans
- Parchment paper (non negotiable for the bottom)
- Fine mesh sifter
- Large mixing bowls
- Rubber spatula
- Wire cooling racks
- Offset spatula for frosting
Step-by-step Assembly
Phase 1: Engineering the Batter
- Sift the cake flour, sugar, baking soda, salt, and cocoa powder into a large bowl. Note: This removes cocoa clumps that look like red dots in the final cake.
- In a separate bowl, whisk together the vegetable oil, buttermilk, eggs, red food coloring, vinegar, and vanilla. Mix until the color is uniform.
- Gradually pour the wet ingredients into the dry ingredients. Mix on low speed until just combined. Stop immediately when no streaks of flour remain to avoid overworking the gluten.
Phase 2: The Bake & Cool
- Grease three 8 inch round cake pans and line the bottoms with parchment paper. Divide the batter evenly between the three pans.
- Bake at 350°F (175°C) for 25-30 minutes. Insert a toothpick into the center until it comes out clean.
- Cool cakes completely on wire racks. Note: Frosting a warm cake is a disaster; the cream cheese will melt into a puddle.
Phase 3: The Frosting & Assembly
- Beat softened cream cheese and butter together until smooth. Add powdered sugar, vanilla, and salt. Beat until fluffy but not over aerated.
- Place one layer on a plate, spread frosting, and repeat. Chill the finished cake for 4 hours to ensure the layers stay put.
Chef's Note: If your frosting looks curdled, it's usually because the butter and cream cheese were different temperatures. Let them sit together at room temperature for an hour before mixing.
Fixing Common Mistakes
Troubleshooting Common Issues
| Issue | Solution |
|---|---|
| Why Your Cake Sinks | This usually happens because the oven door was opened too early or the cake was pulled out 2 minutes too soon. The structure hasn't set, and the air bubbles collapse. |
| Why Your Frosting Is Runny | Over beating the butter or using cream cheese that is too warm breaks the emulsion. If it happens, pop the bowl in the fridge for 15 minutes and whip it again. |
| Why the Color Is Brownish | Too much cocoa powder or using a very dark Dutch process cocoa can muddy the red. Stick to the 2 tbsp measurement. |
Mistakes Checklist:
- ✓ Sifted the cocoa powder?
- ✓ Butter and cream cheese are equally soft?
- ✓ Cake layers are 100% cool?
- ✓ Toothpick came out clean?
- ✓ Used cake flour, not bread flour?
Customizing Your Cake
If you want to shake things up, you can change the profile of this Red Velvet Cream Cheese Cake without ruining the chemistry. For a more traditional feel, you might look at a Red Velvet Birthday Cake recipe which often leans into a slightly different acidity balance.
Flavor Tweaks:
- Espresso Kick: Add 1 tsp of instant espresso powder to the dry ingredients. It deepens the cocoa flavor.
- Citrus Twist: Add a teaspoon of lemon zest to the frosting for an extra bright note.
- Cheesecake Center: Cut a circle out of the middle layer and fill it with a chilled, no bake cheesecake mixture.
Decision Shortcut:
- If you want a denser cake → Use All Purpose flour.
- If you want a brighter red → Use gel food coloring instead of liquid.
- If you want a lighter frosting → Fold in a cup of whipped cream.
Freshness and Storage
This cake actually tastes better on day two because the flavors meld and the moisture redistributes. Because of the cream cheese, it must be stored in the fridge.
Storage Guidelines:
- Fridge: Keep in an airtight container for up to 5 days.
- Freezer: Wrap individual layers in plastic and foil. They last 3 months. Thaw in the fridge overnight.
- Reheating: Don't microwave the frosting! Let the cake sit at room temperature for 30 minutes before serving for the best texture.
Zero Waste Tips: If you have cake scraps from leveling the tops, don't toss them. Crumble them up and mix with a bit of leftover frosting to make cake pops. Also, if you have leftover buttermilk, use it for a batch of fluffy pancakes the next morning. For a different treat to serve alongside, Ice Cream for 6 recipe is a great pairing.
Plating and Serving
Since this is such a bold looking cake, how you present it makes a big difference. According to the USDA FoodData, the high fat content in the frosting makes it quite rich, so a clean slice is key.
Plating Levels:
| Level | Approach | Key Tweak |
|---|---|---|
| Simple | Homey Slice | Serve on a white plate with a few fresh raspberries |
| Polished | The Bakery Look | Use a piping bag for stars on top and a crumb coat |
| Restaurant | Modern Art | Offset slice, a swipe of berry coulis, and mint leaf |
Tips for the Cleanest Slice: 1. Use a long, thin knife. 2. Dip the knife in hot water and wipe it dry between every single cut. 3. Slice vertically, don't "saw" the cake.
Right then, you've got everything you need. This Red Velvet Cream Cheese Cake is all about patience especially that 4 hour chill time. Trust me, if you skip the chill, you'll end up with a leaning tower of cake.
Just keep your ingredients at the right temp, don't over mix your batter, and you'll have a dessert that looks like it came from a high end bakery. Let's get baking!
Recipe FAQs
Which cream cheese is used for red velvet cake?
Use full fat cream cheese. This provides the necessary structural stability and richness to support the cake layers without the frosting becoming too soft.
Is red velvet cheesecake a thing?
Yes, it is a popular variation. It combines the red cocoa cake base with a dense cream cheese filling. For another rich celebration treat, try our peanut butter cake.
Why is red velvet paired with cream cheese?
The tanginess of the cheese balances the sweetness. The acidity of the cream cheese cuts through the richness of the vegetable oil and cocoa for a balanced flavor profile.
How to make a fluffy red velvet cake?
Sift your dry ingredients and mix on low speed. Stop mixing immediately once no flour streaks remain to avoid overworking the gluten and flattening the crumb.
How to bake a red velvet cake?
Bake at 350°F (175°C) for 25-30 minutes. Divide batter evenly between three greased, parchment lined 8 inch pans and cool completely on wire racks before frosting.
How to prevent the cake from sinking?
Avoid opening the oven door too early. Keep the door closed until the 25-30 minute mark to ensure the structure sets before the air bubbles collapse.
How to fix runny cream cheese frosting?
Chill the bowl in the fridge for 15 minutes. Once cooled, whip the mixture again to restore the emulsion broken by over beating or overly warm ingredients.
Red Velvet Cream Cheese Cake

