Easy Danish Recipe with Puff Pastry: Crispy & Creamy

- Time: 15 min active + 20 min baking = Total 40 min
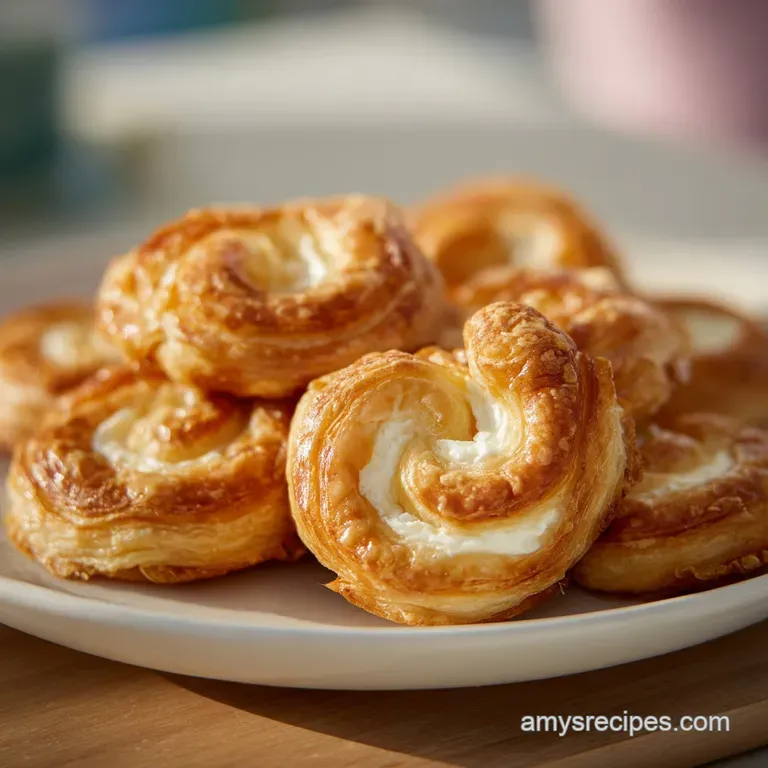
- Flavor/Texture Hook: Shatteringly crisp edges with a tangy, silky center
- Perfect for: Last minute brunch or a "fancy" weekend breakfast
- Easy Danish Recipe with Puff Pastry
- Why These Pastries Actually Work
- Essential Tools for Success
- The Ingredient Breakdown
- Step-by-Step Assembly
- Fixing Common Baking Glitches
- Troubleshooting Common Issues
- Creative Flavor Variations
- Storage and Zero Waste
- The Best Brunch Pairings
- Recipe FAQs
- 📝 Recipe Card
Easy Danish Recipe with Puff Pastry
The second those pastries hit the oven, the smell of melting butter fills the entire kitchen. It's that specific, rich aroma that makes you feel like you've just stepped into a Copenhagen bakery at 6 AM.
I remember the first time I tried to make these from scratch, spending hours folding butter into dough, only for the butter to melt and the whole thing to turn into a greasy pancake. I was devastated, but it taught me a huge lesson: you don't need to suffer for great pastry.
Now, I just use high-quality frozen puff pastry. It's a total win. You get that same professional lift and gold brown finish, but you're done in under an hour. This easy danish recipe with puff pastry is my go to because it delivers that high end result without the stress.
Whether you're hosting friends or just treating yourself, the payoff is massive compared to the actual effort.
We're focusing on a balance of flavors here. You've got the salty sweet cream cheese and the tart punch of fruit preserves, all wrapped in a crust that practically disappears the moment you bite into it.
Trust me, once you see how simple it is to get these looking like a pro made them, you'll never go back to the frozen supermarket versions.
Why These Pastries Actually Work
The magic here isn't in the skill, it's in the structure. Since we're using a pre made base, we're just managing the temperature and the moisture.
- Steam Power: The layers of butter in the pastry turn into steam in the hot oven, pushing the dough upward to create those airy gaps.
- Border Support: Scoring the edges creates a "wall" that keeps the filling from overflowing while the center stays soft.
- Fat Stability: Using full fat cream cheese ensures the filling stays velvety and doesn't break or leak into the crust.
- Egg Wash Seal: The beaten egg creates a protein barrier that browns beautifully and locks in the structure.
| Method | Effort | Texture | Best For |
|---|---|---|---|
| Fast (Puff Pastry) | Low | Light & Airy | Quick Brunch |
| Classic (Laminated) | Very High | Dense & Buttery | Baking Projects |
| Frozen Pre made | None | Uniform/Dry | Emergency Snacks |
Component Analysis
| Ingredient | Science Role | Pro Secret |
|---|---|---|
| Puff Pastry | Structural Base | Keep it cold until the last second |
| Cream Cheese | Moisture Body | Soften at room temp for zero lumps |
| Egg Wash | Color/Seal | Brush only the edges, not the filling |
| Fruit Preserves | Flavor Accent | Use a thick jam to prevent soaking |
Essential Tools for Success
You don't need a professional kitchen for this, but a few specific items make it a breeze. I use a standard baking sheet, but the real hero is the parchment paper. If you skip the parchment, you're risking the pastry sticking, which is a nightmare when you're trying to lift a delicate crust.
A sharp knife or a pizza cutter is essential for those clean squares. If you use a dull blade, you'll squish the layers of the puff pastry, and they won't rise as high. I also recommend a small offset spatula or even just the back of a spoon to spread the cheese without tearing the dough.
Finally,, a medium mixing bowl and a whisk are all you need for the filling and the glaze. If you have a handheld mixer, it'll make the cream cheese even airier, but a whisk and some elbow grease work just as well.
The Ingredient Breakdown
For this easy danish recipe with puff pastry, we're sticking to a few high-quality staples.
The Base & Filling 1 sheet (480g) frozen puff pastry, thawed but chilled Why this? Provides the essential flaky layers 1 large egg, beaten Why this? For that deep golden brown color 8 oz (225g) cream cheese, softened Why
This? Creates a rich, tangy center 2 tbsp (25g) granulated sugar Why this? Balances the tang of the cheese 1 tsp (5ml) vanilla extract Why this? Adds a warm, aromatic depth 1/4 tsp (1.2g) salt Why this? Sharpens all
The other flavors 1/2 cup (120ml) fruit preserves Why this? Adds concentrated fruit sweetness
The Finishing Glaze 1/2 cup (60g) powdered sugar Why this? Dissolves quickly for a smooth drip 1 tbsp (15ml) whole milk Why this? Controls the thickness of the glaze 1/4 tsp (1.2g) vanilla extract Why this? Ties the
Glaze to the filling
| Original Ingredient | Substitute | Why It Works |
|---|---|---|
| Heavy Cream Cheese | Mascarpone | Creamier and milder. Note: Less tangy than traditional cream cheese |
| Fruit Preserves | Fresh Berries | Natural tartness. Note: May release more moisture, risking a soggy bottom |
| Whole Milk | Lemon Juice | Adds a zingy contrast. Note: Thins the glaze similarly to milk |
| Beaten Egg | Heavy Cream | Still browns well. Note: Not as shiny or deep in color as egg |
If you're looking for more breakfast inspiration, my protein energy balls are great for those days when you don't have time for a full bake.
Step-by-step Assembly
Let's get these in the oven. The key here is speed and temperature. If the pastry gets too warm, it'll lose its lift.
Phase 1: Preparing the Foundation
- Preheat your oven to 400°F (200°C) and line a large baking sheet with parchment paper. Note: Doing this first ensures the oven is fully hot.
- Unroll the chilled puff pastry on a lightly floured surface and cut into 12 equal squares (roughly 3x3 inches each).
- Lightly score a smaller square inside each piece about 1/2 inch from the edge to create a border. Note: Don't cut all the way through, just a light indent.
Phase 2: Filling and Assembly
- In a medium bowl, beat the softened cream cheese, granulated sugar, 1 tsp vanilla extract, and salt until smooth and airy.
- Place a generous tablespoon of the cream cheese mixture into the center of each pastry square, spreading it toward the scored edges.
- Spoon 1 teaspoon of fruit preserves directly onto the center of the cream cheese filling.
- Brush the outer edges of the pastry with the beaten egg wash. Note: Avoid getting egg on the cheese, or it won't brown the same way.
Phase 3: Baking and Glazing
- Bake for 18–22 minutes until the pastry has puffed and the edges are golden brown.
- Remove from oven and let cool on the pan for 5 minutes to allow the filling to set.
- Whisk together the powdered sugar, milk, and 1/4 tsp vanilla extract until smooth, then drizzle over the cooled pastries.
Chef's Tip: To get a really professional look, use a toothpick to swirl the fruit preserves into the cream cheese slightly before baking. It creates a beautiful marbled effect.
Fixing Common Baking Glitches
Even with an easy danish recipe with puff pastry, things can occasionally go sideways. Usually, it comes down to temperature or moisture.
Troubleshooting Common Issues
| Issue | Solution |
|---|---|
| Why Your Pastries Didn't Rise | If your danishes look more like flat crackers than fluffy pastries, your dough was likely too warm. When the butter in the puff pastry melts before it hits the oven, you lose those distinct layers. Ac |
| Why the Filling Is Leaking | This usually happens if the fruit preserves are too watery or if you overfilled the center. The cream cheese acts as a dam, but if the jam is thin, it'll seep through. Always use a thick preserve or j |
| Why the Crust Is Pale | A pale crust usually means the oven wasn't hot enough or the egg wash was too thin. Make sure your oven is fully preheated to 200°C. If you forgot the egg wash, you can still glaze them, but they won' |
Common Mistakes Checklist
- ✓ Did you chill the pastry?
- ✓ Did you score the edges without cutting through?
- ✓ Is the oven actually at 200°C?
- ✓ Did you let them cool for 5 minutes before glazing?
- ✓ Did you brush the egg wash only on the borders?
Creative Flavor Variations
Once you've mastered the base easy danish recipe with puff pastry, you can really play with the colors and tastes. For a beautiful visual balance, I like to use three distinct color accents: a deep red raspberry center, a bright green mint leaf garnish on top, and the stark white of the glaze.
For an Easy Apple Danish Recipe with Puff Pastry Swap the preserves for finely diced Granny Smith apples sautéed in a bit of cinnamon and butter. Since fresh apples release more water, sauté them first to concentrate the flavor.
For a Berry Cheese Danish Recipe Use a mix of fresh blueberries and raspberries. Push the berries into the cream cheese and sprinkle a pinch of lemon zest over the top before baking for a fresh, summery vibe.
For a Savory Twist Skip the sugar and vanilla in the cheese. Use a pinch of black pepper and top with a slice of heirloom tomato and a sprinkle of dried oregano. It's a great way to use the same puff pastry for a brunch appetizer.
If you love using fruit in your baking, you might also enjoy my Cake Recipe with Oil, which uses a similar balance of citrus and sweetness.
Storage and Zero Waste
Don't let those little bits of leftover puff pastry go to waste! I always gather the scraps, twist them into little knots, brush them with the remaining egg wash, and sprinkle them with cinnamon sugar. They bake in about 10 minutes and are the perfect "chef's snack" while the main danishes are cooling.
- Fridge
- Store in an airtight container for up to 3 days. The pastry will soften slightly, but the flavor stays great.
- Freezer
- You can freeze the unbaked, assembled danishes for up to 2 months. Wrap them individually in plastic wrap and freeze them on a tray first.
- Reheating
- To bring back the shatter, pop a chilled danish in a 180°C oven for about 5 minutes. Avoid the microwave, or you'll end up with a chewy, soggy mess.
The Best Brunch Pairings
These danishes are decadent, so you want to pair them with things that cut through the richness. A strong, bitter black coffee or a sharp espresso is the classic choice because it balances the sweet glaze. If you're doing a full spread, some fresh sliced melon or a tart grapefruit half provides a refreshing contrast.
If you're serving a crowd, I recommend a mix of these sweet pastries and something savory, like a vegetable frittata or smoked salmon on rye. It keeps the meal from feeling too heavy.
Right then, you've got everything you need to pull off a bakery level breakfast at home. Just remember: keep that pastry cold, don't overfill the centers, and enjoy the process. Happy baking!
Recipe FAQs
What is the easiest thing to make with puff pastry?
Simple fruit danishes. Combining a pre-made chilled sheet with cream cheese and preserves requires minimal effort and only 15 minutes of prep.
Can a diabetic eat puff pastry?
Generally no. The high concentration of refined flour and sugars in the pastry and filling can cause significant blood glucose spikes.
Can puff pastry be used for Danish?
Yes, it is an ideal shortcut. It provides the buttery, laminated layers characteristic of a Danish without the hours of manual folding.
What's the secret to flaky Danish?
Keep the dough cold until it hits the oven. If the butter melts before baking at 400°F, you lose the lift. If you loved the sweet tart balance of the fruit here, see how we use the same profile in our strawberry cranberry preserve.
How to prevent the filling from leaking?
Use a thick fruit preserve. Watery jams seep through the cream cheese barrier, while dense preserves stay contained within the pastry border.
Why didn't my danishes rise?
The dough was too warm during assembly. When the butter softens before it reaches the oven, the pastry becomes flat and cracker like instead of airy.
How to store leftover pastries?
Store them in an airtight container. They last up to 3 days in the refrigerator, although the pastry may soften slightly.
Easy Puff Pastry Danish