Birthday Ice Cream: Velvety and Festive

- Time:15 minutes active + 6 hours chilling = Total 6 hours 15 mins
- Flavor/Texture Hook: Velvety smooth base with cakey chunks and a shatter crisp sprinkle finish
- Perfect for: Last minute celebrations or a celebratory treat for a sweet tooth
- Birthday Ice Cream
- Why the Texture Stays Velvety
- Breaking Down the Components
- Gear for the Job
- Bringing It Together
- Fixing Common Freezing Issues
- Troubleshooting Common Issues
- Twists on the Classic Flavor
- Simple Ways to Adjust Batch Size
- Forgotten Facts and Myths
- Preservation Secrets
- Presentation Tips
- Recipe FAQs
- 📝 Recipe Card
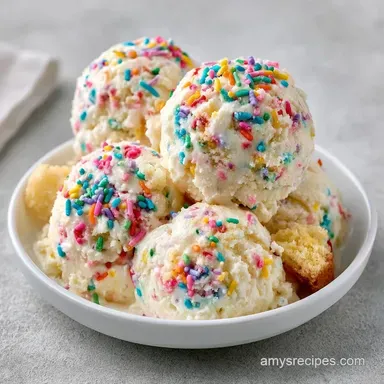
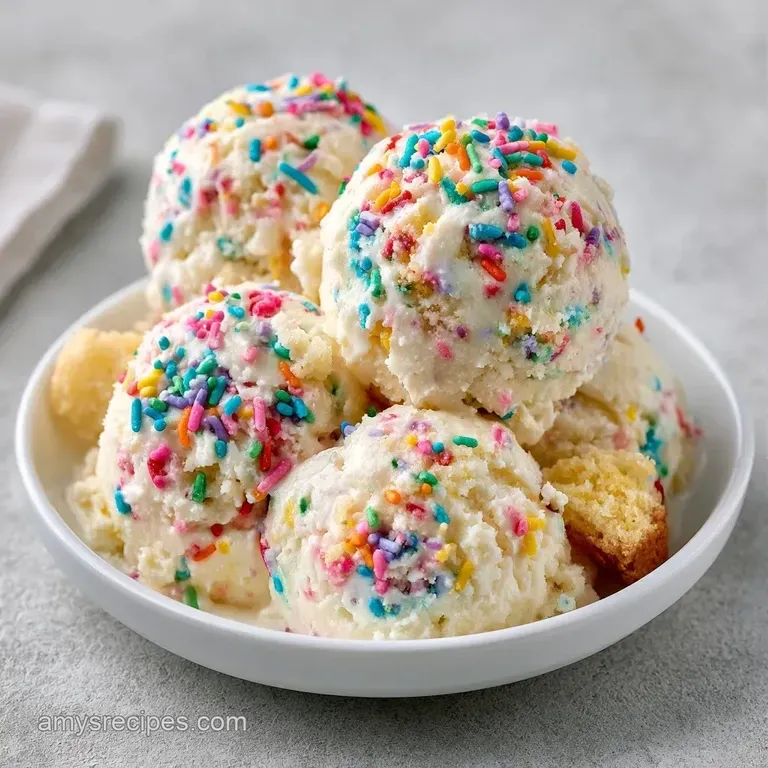
Birthday Ice Cream
The smell of vanilla bean and sugary cake batter hitting the air is enough to make anyone feel like a kid again. I remember the first time I tried to make a celebratory treat for my niece's fifth birthday. I had this vision of a towering bowl of colorful scoops, but I didn't own an ice cream maker back then.
I spent an hour stirring a freezing bowl of cream by hand, only to end up with something that had the texture of a frozen popsicle. It was a total flop, and the look of disappointment on her face was a real motivator.
That's when I discovered the magic of no churn bases. Once I realized you could use whipped cream to provide the aeration that a machine usually handles, everything changed. This specific Birthday Ice Cream recipe is my go to because it doesn't just taste like vanilla, it actually tastes like a slice of cake in frozen form.
You can expect a treat that's incredibly rich but feels light on the tongue. We're talking about a velvety base folded with actual bits of sponge cake and a kaleidoscope of rainbow sprinkles.
It's the kind of dessert that makes you feel like you've spent hours in the kitchen, even though you'll actually be done with the hard part in about 15 minutes.
Why the Texture Stays Velvety
Most people think you need a machine to avoid those annoying ice crystals, but this recipe uses a few clever tricks to keep things smooth.
- Air Pockets: Beating the heavy cream creates millions of tiny bubbles. These bubbles act as barriers, preventing the fat and water from freezing into one solid, icy block.
- Sugar Shield: The high sugar content in sweetened condensed milk lowers the freezing point of the mixture. This ensures the scoop is soft enough to glide across your tongue rather than feeling like a frozen brick.
- Fat Barrier: The high fat content from the cream coats the water molecules, which stops them from joining together into large crystals. According to the experts at Serious Eats, managing these ice crystals is the secret to any professional grade frozen dessert.
- Cake Absorption: The diced sponge cake pieces soak up a bit of the moisture from the base, turning into little pockets of fudgy cake rather than hard frozen lumps.
| Method | Time | Texture | Best For |
|---|---|---|---|
| No Churn | 15 min active | Velvety & Soft | Quick prep, no equipment |
| Traditional Churn | 4 hours+ | Dense & Airy | Purest texture, large batches |
Breaking Down the Components
I've found that the quality of your cake batter extract makes or breaks this dish. Don't just use plain vanilla if you want that specific "birthday" vibe.
| Ingredient | Science Role | Pro Secret |
|---|---|---|
| Heavy Cream | Provides structure and air | Must be chilled to 4°C for max volume |
| Condensed Milk | Sweetener and softener | Room temp blends easier into cream |
| Cake Batter Extract | Primary flavor profile | Add a pinch of salt to make it pop |
| Sponge Cake | Texture contrast | Use a slightly stale cake for better bite |
Gear for the Job
You don't need a fancy laboratory here, but a few specific tools make the process way smoother.
- Electric Hand Mixer or Stand Mixer: You can do it by hand, but your arm will regret it. A mixer ensures those stiff peaks form quickly.
- Cold Metal Bowl: If you have a stainless steel bowl, put it in the freezer for 10 minutes before starting. Cold bowls keep the cream stable.
- Silicone Spatula: This is non negotiable. You need a flexible edge to fold the ingredients without deflating the air you just spent time beating into the cream.
- 9x5 Metal Loaf Pan: Metal freezes faster than plastic, which helps the Birthday Ice Cream set more evenly.
Bringing It Together
Right then, let's get into the actual making of it. The key here is the "fold" - if you stir too hard, you'll lose all that air and end up with a dense block of frozen milk.
Phase 1: Aerating the Base
- Pour 480ml (2 cups) of chilled heavy whipping cream into a cold bowl.
- Beat on medium high speed until stiff peaks form. You'll know it's ready when you lift the beaters and the cream stands straight up without drooping. Note: Don't overbeat or you'll accidentally make butter.
Phase 2: Folding the Flavor
- In a separate medium bowl, whisk together 397g (14 oz) of sweetened condensed milk, 5ml (1 tsp) of cake batter extract, and a pinch of sea salt.
- Scoop about a third of the whipped cream into the condensed milk mixture. Stir it in briskly to lighten the mixture.
- Gently fold the remaining whipped cream into the condensed milk using a slow under and over motion until no white streaks remain. Note: This keeps the Birthday Ice Cream light and fluffy.
Phase 3: Adding the Celebration
- Fold in 60g (1/2 cup) of rainbow sprinkles and 120g (1 cup) of finely diced vanilla sponge cake.
- Pour the mixture into a 9x5 inch metal loaf pan.
- Smooth the top with your spatula and cover with parchment paper, pressing the paper directly onto the surface of the cream.
- Freeze for 6 hours until firm to the touch.
Chef's Tip: If you want a deeper flavor, try browning some butter and mixing a teaspoon of it into the condensed milk before folding. It adds a nutty, toasted note that mimics a baked cake.
Fixing Common Freezing Issues
Even with a simple recipe, things can go sideways. Most issues with No Churn Birthday Ice Cream come down to temperature or technique.
Troubleshooting Common Issues
| Issue | Solution |
|---|---|
| Ice cream icy instead of smooth | This usually happens if the cream wasn't whipped enough or if the container wasn't airtight. When air escapes, water crystals take over. |
| Why did the mixture separate or deflate | Over mixing is the culprit. If you stir the condensed milk in too aggressively, you'll pop the air bubbles. Once the air is gone, the heavy milk sinks to the bottom, and the cream stays on top. |
| Stop it from freezing too hard | If your freezer is set to a "deep freeze" setting, the sugars can't do their job. Let the container sit on the counter for 5-10 minutes before scooping. |
Common Mistakes Checklist
- ✓ Using room temperature cream (it won't peak)
- ✓ Stirring instead of folding the mix ins
- ✓ Skipping the sea salt (it balances the sugar)
- ✓ Leaving the pan uncovered in the freezer
- ✓ Using large chunks of cake (keep them small)
Twists on the Classic Flavor
Once you've mastered the basic Birthday Ice Cream, you can really start to play around with the mix ins. This is where you can make it your own.
If you're feeling fancy, you can swap the vanilla sponge cake for pieces of a homemade brownie or even some crushed peppermint bark during the holidays. For a more sophisticated vibe, try replacing the rainbow sprinkles with toasted almond slivers and a swirl of salted caramel.
If you prefer something with a bit more of a European feel, you could try a Quick Birthday Cake Gelato approach by increasing the cream to milk ratio.
Decision Shortcut
- If you want it more "cakey", double the sponge cake pieces.
- If you want it less sweet, add a teaspoon of lemon juice to the condensed milk.
- If you want a color pop, use neon colored sprinkles instead of rainbow.
| Original Ingredient | Substitute | Why It Works |
|---|---|---|
| Heavy Cream | Full fat Coconut Cream | Similar fat content. Note: Adds coconut flavor, best for tropical twists |
| Sweetened Condensed Milk | Evaporated Milk + Sugar | Mimics thickness. Note: Texture will be slightly less velvety |
| Cake Batter Extract | Vanilla Paste + Almond Extract | Creates a similar "bakery" aroma. Note: Less intense than specific extract |
Simple Ways to Adjust Batch Size
Scaling a frozen dessert isn't as simple as doubling everything, especially when it comes to the air content.
Scaling Down (1/2 Batch) Use a smaller 4x6 inch container. Since there's less mass, it'll likely freeze faster - check it at 4 hours. If the recipe calls for an egg (which this one doesn't, but for future reference), beat one egg and use half.
Scaling Up (2x Batch) Work in batches if your mixer bowl is small. Do not overfill your pan; leave at least an inch of space at the top for expansion. I recommend increasing the sea salt to 1.5x to maintain the flavor balance across the larger volume of sugar.
Baking Adjustments Since this is a no bake recipe, temperature isn't an issue, but if you're making your own sponge cake to put inside, remember that doubling a cake recipe usually requires lowering the oven temp by 10-15°C and extending the bake time to ensure the center cooks
Without burning the edges.
Forgotten Facts and Myths
I've heard a lot of weird advice about homemade frozen treats over the years. Let's clear a few things up.
Myth: You must use a professional stabilizer like guar gum for smoothness. Not true for no churn. The fat in the heavy cream and the sugar in the condensed milk act as natural stabilizers. As long as you whip the cream correctly, it'll be silky.
Myth: Putting the pan in a water bath before freezing helps. This is for custards, not no churn ice cream. In fact, adding extra moisture or humidity to the pan can actually encourage those dreaded ice crystals to form.
Myth: Using low-fat cream still works. Honestly, don't even bother. low-fat cream doesn't have enough fat globules to trap the air bubbles. You'll end up with a frozen milkshake rather than a scoopable dessert.
Preservation Secrets
Storing this is pretty straightforward, but a few tweaks can keep it from tasting like "freezer air" after a week.
Storage Guidelines Keep the Birthday Ice Cream in an airtight container. If you used a loaf pan, transfer it to a plastic tub with a tight lid once it's frozen. It'll stay fresh in the freezer for about 2 months.
After that, the flavor of the cake pieces starts to fade, and it can pick up smells from other frozen foods.
Zero Waste Tips If you have leftover sponge cake, don't toss it! Dice it up and freeze it in a small bag for your next batch. You can also use the leftover cream from the carton to make a quick whipped topping for the scoops.
If you have a bit of condensed milk left in the can, stir it into your morning coffee for a creamy, sweet treat.
Presentation Tips
How you serve this depends on who you're serving it to. You can go from a casual snack to a restaurant style dessert with just a few changes.
Plating Levels
| Level | Style | Key Tweak |
|---|---|---|
| Simple | Casual Bowl | Large scoop, extra sprinkles on top |
| Polished | Party Plate | Two scoops, a fresh strawberry, and a mint leaf |
| Restaurant | Gourmet Dessert | A perfect quenelle, cake crumble "soil", and a drizzle of syrup |
For the restaurant look, use two warm spoons to shape the ice cream into a smooth, oval quenelle. Place it on a plate over a bed of crumbled cake and add a few dots of raspberry coulis for a pop of color. It looks like it costs $15 a portion, but it's just the same Birthday Ice Cream we made in a loaf pan.
Recipe FAQs
How to make a layered ice cream cake?
Layer your mixture with cake pieces in a pan. Pour the contents into a 9x5 inch metal loaf pan, cover with parchment paper, and freeze for 6 hours until firm.
What are some creative alternatives to traditional birthday cakes?
Birthday ice cream is a great choice. You can also explore a rich eggnog dessert for other special occasions.
How much ice cream mixture is needed to fill a cake pan?
Use a 9x5 inch metal loaf pan. This size fits the combination of 2 cups of heavy cream and one 14 oz can of sweetened condensed milk perfectly.
How to make birthday ice cream without a churner?
Beat chilled heavy cream on medium high speed until stiff peaks form. Gently fold in the condensed milk mixture and sponge cake pieces to maintain aeration before freezing.
Does this recipe actually taste like birthday cake?
Yes, it does. The combination of cake batter extract, vanilla sponge cake, and rainbow sprinkles creates a classic birthday cake flavor profile.
Can I use Greek yogurt instead of cream for a no-churn version?
No, this recipe requires heavy cream. Greek yogurt lacks the necessary fat and air-trapping properties needed for this specific no-churn method.
Why did my ice cream turn out icy instead of smooth?
The cream likely wasn't whipped enough or the container wasn't airtight. When air escapes during the freezing process, water crystals take over and ruin the texture.
No Churn Birthday Ice Cream